

Knowing where to check your dog for ticks after a woodland walk helps you find tiny hitchhikers hidden beneath the coat. Follow this head-to-paw sequence, paying particular attention to ears, collar lines, armpits, groin and the spaces between toes—even if your dog already uses tick prevention.
Prepare your dog and part dense fur
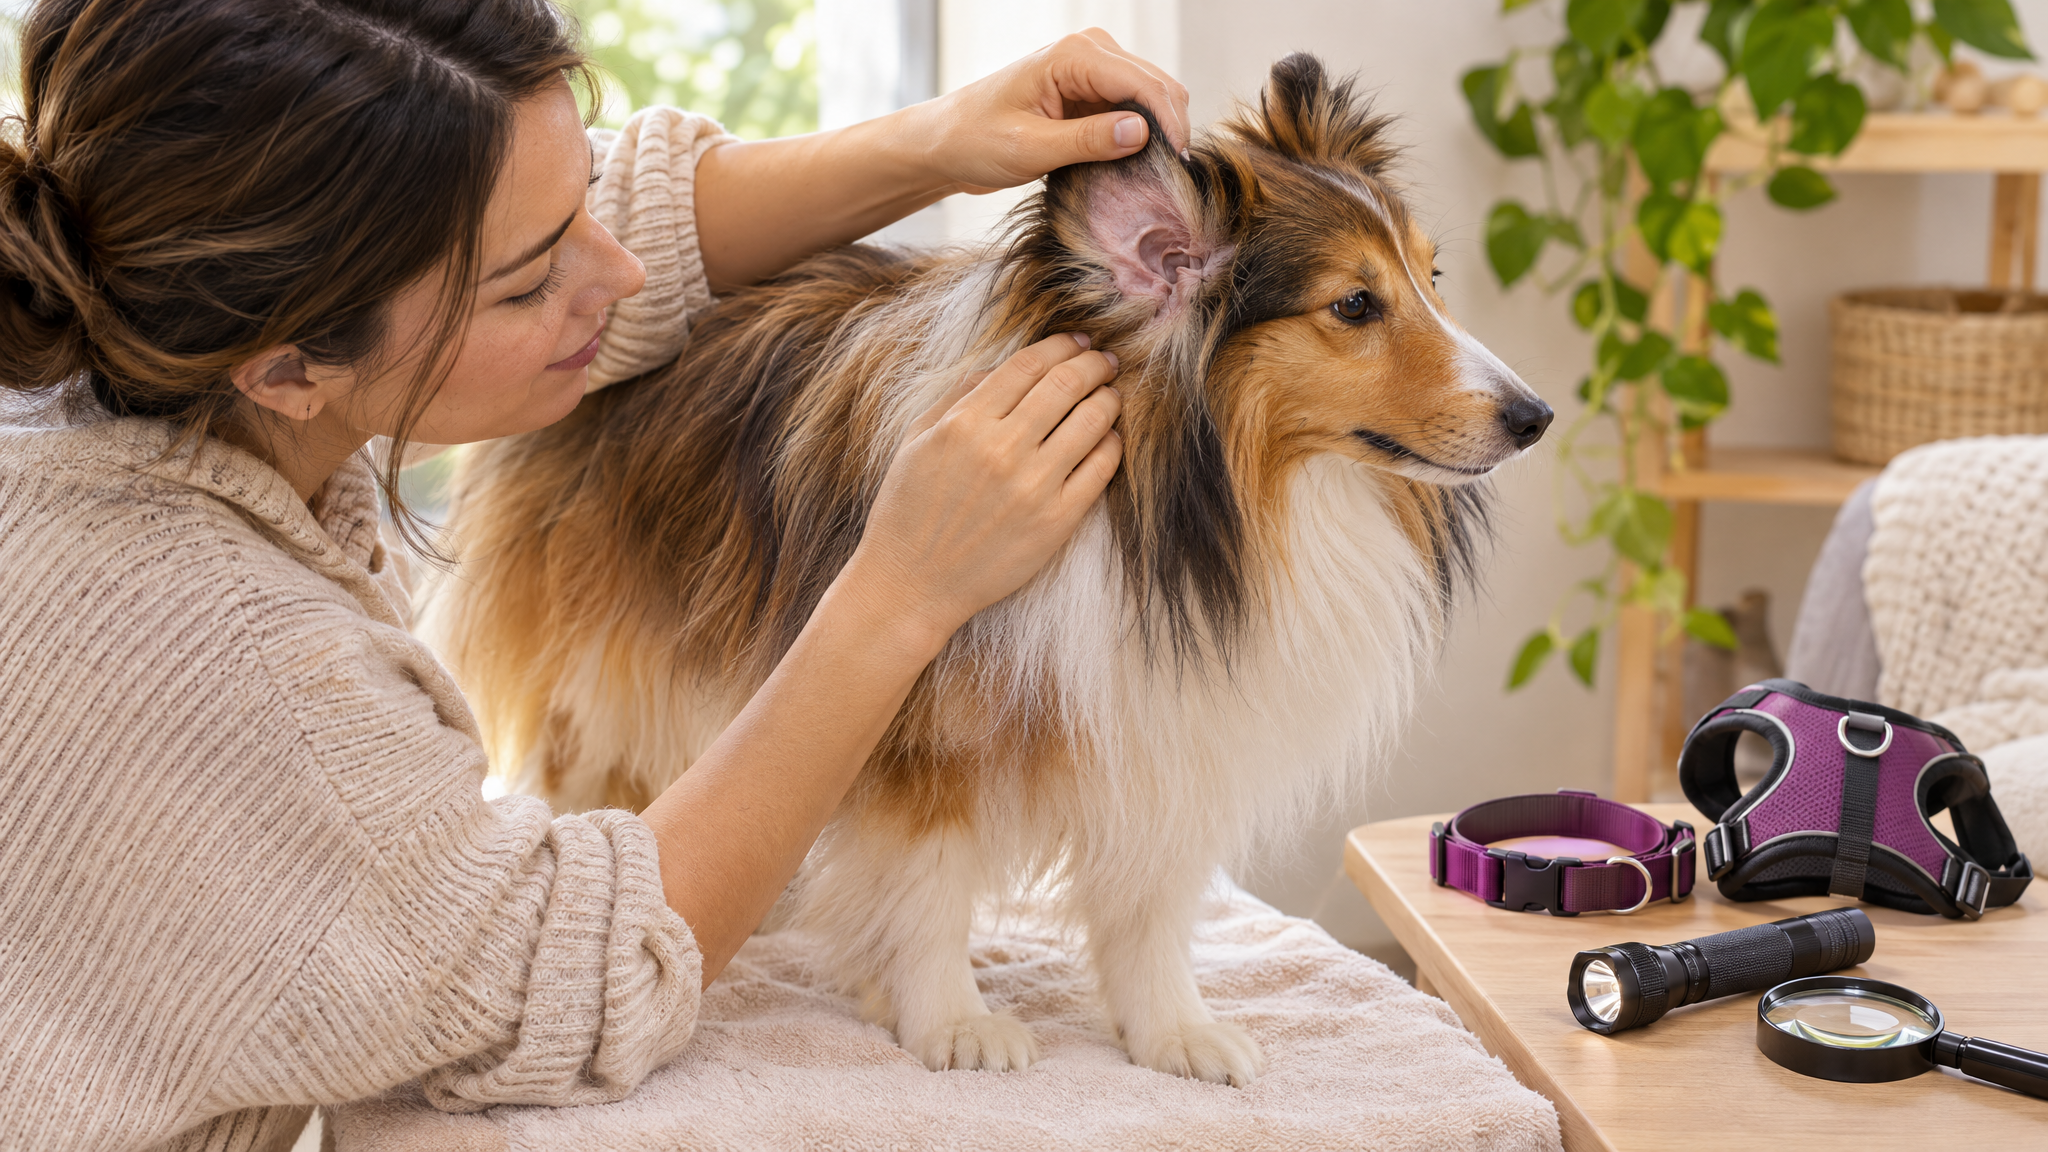
Start soon after returning home, somewhere bright and comfortable. Have a torch, a magnifying glass if available, and treats ready. A pale towel underneath can make crawling ticks easier to notice.
For thick or double coats, use your fingers to separate the hair into narrow rows until you can see the skin. Work against the direction of hair growth, holding each part open while inspecting it, then move across slightly so no strips are missed.
Combine looking with gently feeling: slide your fingertips over the skin to find unfamiliar pinhead-sized bumps. Do not rake a comb over a suspicious lump or tug it to test whether it is attached.
Where to check your dog for ticks first
Checkpoint 1: Ears and face
Lift each ear flap and inspect its outer surface, underside, edges and the crease where it joins the head. Look only into the visible ear opening; do not insert fingers or tools into the ear canal.
Part the fur behind the ears, then inspect the cheeks, muzzle and beneath the chin. Look carefully around the eyelids without touching the eye, as small ticks are easily missed here.
Checkpoint 2: Collar and harness lines
Once your dog is safely indoors, remove the collar and harness to inspect the skin beneath them. Work around the entire neck and along every strap contact area, including the chest and shoulders.
Quick tip: Use the same checking order after every woodland walk. Reward your dog between checkpoints, and take short breaks if they become restless. A calm, methodical check is easier than rushing.
Check the armpits, groin and tail base
Checkpoint 3: Armpits and chest
With your dog standing comfortably, gently lift one front leg just enough to see the fold where it meets the body. Check that armpit, the nearby chest and the inside of the leg, then repeat on the other side.
These sheltered areas can hide ticks beneath soft, fine hair. Part the coat rather than relying on a quick glance over its surface.
Checkpoint 4: Groin, belly and tail base
Encourage your dog to lie comfortably on their side if they tolerate it, without forcing their position. Inspect the lower belly, inner thighs and groin folds, including the skin around the genitals.
Check around the tail base and beneath the tail. Nipples and skin tags can resemble attached ticks, so inspect unfamiliar bumps closely rather than picking at them. Stop if handling causes discomfort.
Inspect every paw and finish the body sweep
Checkpoint 5: Toes, pads and lower legs
Lift each paw and gently separate the toes, checking the skin between them from above and below. Look around the pads, nail bases and any dewclaws, where small ticks can sit out of sight.
Part long hair around the feet and inspect up each lower leg. Keep movements gentle, especially if your dog dislikes having their paws handled, and pause when needed.
Now sweep the remaining coat systematically: shoulders, back, flanks, chest, belly and the length of the tail. The highlighted checkpoints deserve extra attention, but ticks can attach elsewhere. Finish with a whole-body check rather than stopping at the paws.
Recognise small ticks and choose prevention
The sheep or castor bean tick, Ixodes ricinus, can be difficult to spot when immature and unfed. Some stages are roughly poppy-seed-sized; an attached tick may look like a tiny dark speck or raised bump against the skin.
As ticks feed, their bodies swell and may become greyish or brownish. Under magnification, you may see tiny legs near the attachment point, although fur and the tick's position can obscure them.
Attachment alone does not prove a bump is a tick, and colour or size cannot reliably identify the species. An attached tick needs prompt, safe removal rather than being left until the next preventive treatment. Ask your vet for help if you are unsure.
Pair physical checks with a suitable product from our dog flea, tick and worming range. Check that the label specifically covers ticks, suits your dog's age and weight, and gives clear protection and repeat-treatment intervals. Flea or worm coverage alone does not establish tick coverage.
For homes with cats, choose separately from our cat flea, tick and worming range. Never apply a dog tick product to a cat: some ingredients can be highly toxic to cats. Follow label precautions about contact between treated pets.
Frequently Asked Questions
- Can my dog still have ticks while using prevention?
Yes. Depending on how the product works, a tick may crawl onto or attach to your dog before it is affected. Continue checking after woodland walks and follow the labelled treatment schedule.
- How can I check a dog with a very thick coat?
Work in small sections under bright light, parting the coat down to the skin with your fingers. Feel gently for bumps as well as looking, especially in folds and beneath equipment.
- Does a tick always look like a swollen grey lump?
No. Small, unfed ticks can look like flat brown or dark specks. Inspect suspicious spots with magnification, without squeezing or pulling them to establish what they are.
Browse tick prevention for your dog and choose a labelled option that fits their age, weight and needs. If you cannot identify a suspicious bump or your dog seems unwell, contact your vet.